How To Do Stage Makeup
by Ashley Griffin, Guest Editorial
Stage makeup is a unique art, and yet, in our age of thousands of online makeup tutorials that can teach you everything from how to do the perfect winged eyeliner, to how to transform yourself into Jack Skellington, is often neglected or not talked about. It is occasionally taught in theater programs in a one-off course, but most often, it is thought of (at least for female-identifying folks or those playing traditionally female roles) as simply an extension of your everyday makeup.
But the thing that makes stage makeup unique is that it’s not just about “applying good makeup…” once you’re onstage in a large space with extreme lighting, a lot of the traditional rules go out the window. Things that, online, we now have filters and apps to adjust for – color balance, glare, etc. have one thing to correct them when we are in live performance. Makeup. And yet, how to do that is often never a part of the stage makeup conversation.
I first wore stage makeup when I was two years old. I started having the application process explained and taught to me when I was five, and by eight, I was expected to apply it on my own. I grew up in a wonderful rep company and what they taught me is still the basis of what I do today. And not just “standard” stage makeup – I did everything from elaborate fairy design to involved Commedia whiteface with intricate drawings meant to give it the illusion that I was wearing a mask.
Please note, I’m not going to address specialty makeup or special effects makeup here. I’m focusing on makeup, where you just need to look like a normal person walking down the street. Also, keep in mind that one aspect of stage makeup, even natural makeup, is the requirements of the character – what time period you’re in, what style of makeup your character would wear, etc. Often you have a makeup designer to help with these things, but sometimes you’re left to your own devices. But those decisions, I’ve found, mainly come down to lip shape/color, and eyeshadow. Everything else remains pretty standard in order for your makeup to function as it needs to onstage.
I’m grateful that stage makeup was my introduction to makeup in general. I internalized makeup as being a fun, artistic venture, not something meant to correct “problems” with my face. It’s part of creating a character and allows you to “put on a mask” (in the Commedia sense) and step into another person’s guise.
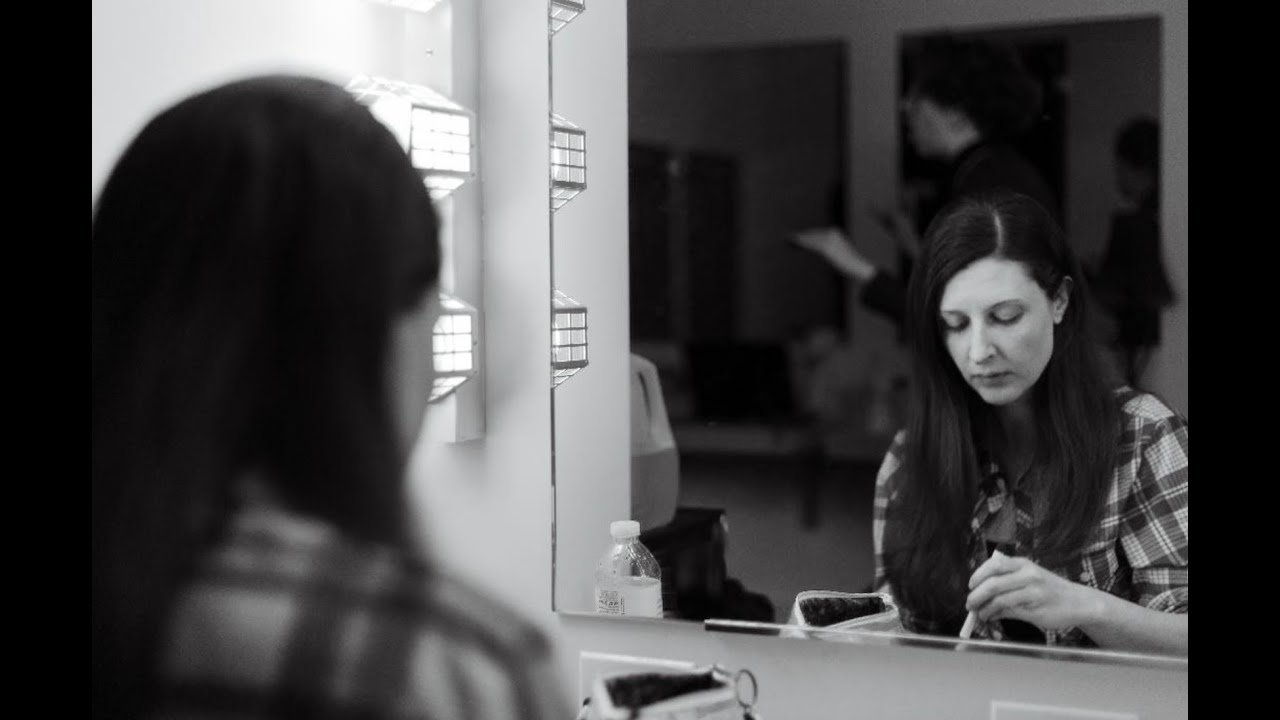
Here are the steps I take when I’m doing standard stage makeup along with the products I personally use. Please note, these are not the only products you can use, but they have been chosen because of what they do under stage lights, and not every product on the market is able to fill that role. Also, please note that I am Caucasian, and my makeup routine is specifically for someone with light skin. Honestly, the main thing this affects is the kind of highlight and shadow I use, and the shades of foundation, eyeshadow, etc.
1.) Prepping My Face - Honestly, in my regular life, I try to wear as little makeup as possible. I have a skin regimen that I love, and, unless I’m going to an audition or a big meeting, I generally just throw on a bit of concealer, maybe a little powder, some brow liner, and lip gloss, and I’m good to go. I’ve found that, for me, this keeps my skin healthy and prevents breakouts. And, since you’re going to be putting a LOT of makeup on your face for performance, this allows your skin some breathing room. So I’ll wash and moisturize my face in the morning and then if I can, leave it until I have to get ready for the show. Some important things to note:
- Above all, NEVER wash and moisturize your face immediately before putting on stage makeup. It’s the time when makeup is least able to “stick” to your face and, along with that, it’s also a perfect recipe for your skin to absorb a lot more of your foundation than it ordinarily would. I personally like to have at least an hour between moisturizing and applying foundation, but I would say at bare minimum, give it half an hour.
- Always remove your makeup as quickly as you are able and NEVER sleep in your makeup (especially stage makeup.)
- I always put some sort of lip balm on my lips before I start. It’ll help keep your lips moisturized under your makeup (and once you’ve powdered, you can’t really apply lip balm later…) I do this first thing so it has enough time to set before I get to my lipstick.
If you’re wearing a wig, I like to pin-curl my hair and put it in a wig cap before I do my makeup – that way I don’t have to worry about doing my hair, and it’s all nicely out of my way so I can have easy access to my face.
2.) I start with foundation. For most stage makeup, I use Max Factor Pan Stik. I like to apply it with those little triangular sponges…it’s what I’ve used all of my life, I like the way it can couture to your face, and you don’t have to worry about having water to get the sponge damp, or worry about making sure it dries before you put it back in your makeup case. Plus they’re easy to clean. I’ll apply the foundation in lines all over my face then blend using the sponge, making sure I blend down into my neck, hairline, and ears. The purpose of this foundation is to give your skin a natural color under the lights (for a lot of venues if you walk out with nothing on your face will get washed out,) and to provide a base for the rest of your makeup (you can use it like a primer.)
3.) Next, I do “highlight” and “shadow.” The purpose of highlight and shadow, especially onstage, is to literally rebuild your bone structure from the ground up. You’ve just covered your skin with foundation that can be read under the lights, now you need to make sure that the bone structure of your face is just as clear under those lights as it is in real life. Traditionally I use Joe Blasco in TV White. I’ve found that a myriad of products can be used for the shadow depending on how defined you want the contours of your face for a particular role, and how large the venue is – I’ve even used a brown eyeliner pencil on occasion when I just want the smallest hint of a contour. But I have never strayed from the highlight I use. The color is specifically a kind of white that reads as pure white under the lights – it the makeup version of doing “white balance” when you’re editing a photos. It helps the human eye read all the other colors on your face more accurately. I start with highlight – I put some along my cheekbones, a little along the top of my nose, and just a touch on my forehead where it meets the bridge of my nose. Then I blend using my finger in little taps, making sure not to streak. Then I apply the shadow – a little bit right under where I put the highlight on my cheekbones, and a little along the sides of my nose. Then I blend the shadow, also using my finger.
4.) If I need any extra coverage for any blemishes, dark circles, etc. I’ll add a little more foundation and blend.
5.) Only after applying my base (foundation,) highlight, and shadow will I do my first powder. I like to use Coty Airspun for the primary reason that it’s a translucent powder and won’t cover up any of the colors I put on my face. Note: I do not powder my eyelids at this time (but I powder everything else – and make sure to get the foundation you blended into your neck and ears…) This kind of powder is meant to hold everything in place and also prevent glare from the lights.
6.) Now I move on to my eyes. The fact that I haven’t powdered them means the raw foundation I applied can also serve as a primer, and it helps the eye makeup stick to my eye. When really going for a neutral look, I stick with a light brown (beige) color, a darker brown, and maybe a matte white. I have hazel eyes, which pop a bit more when contrasted with the color purple, so I’ve found brown eyeshadow colors (mainly my dark brown) that lean a bit toward the purple side. I start by applying light brown all over my lids, then I use dark brown on the base of my lid and a little bit in the crease. The point of this eye makeup is not to make it look like I’m wearing eyeshadow, but rather to recreate the natural color shift of my eyelid. Your lower lid naturally appears darker than your upper lid, and all we’re doing is redefining that shift, so it’s visible under the lights. I use a bit of matte white right under my eyebrow to help better define the space between my eye and eyebrow.
7.) I use brown eyeliner on the top and bottom of my lids, subtly, with no wings, and, this is personal to me, a little bit of white on my lower water line. Putting white near the outline of your eye – whether on the water line or on the inner or outer edge expands the reach of the whites of your eyes and makes them look larger. As a fun side note (an example of the opposite effect,) using red eyeliner, or even a red lip pencil on your lower waterline will emphasize the veins in your eyes and make them appear more bloodshot. This is a great trick if you ever have to play someone who’s sick, or on a lot of drugs.
8.) I use the same brown eyeliner and darker brown eyeshadow to define my brows.
9.) Now I powder my eyes.
10.) After I’ve powdered my eyes, I apply mascara. I use black mascara for stage, along with an eyelash curler. I don’t powder my mascara. I HIGHLY recommend using waterproof mascara onstage – you never know when you might need to cry and, especially if it’s not a part of the character, mascara running down your face isn’t a great look…
11.) Now I move on to blush. You want something that naturally just adds a subtle glow to your face, not something that is instantly recognizable as blush. I put a bit along my cheekbone line, and then some in the apple of my cheek. You also want to add a tiny bit to the bottom of your nose (right along where your nostrils are) and a little bit on your forehead. Again, this is just to bring back some color to your face under the lights.
12.) Finally, I do my lips. This is definitely character-dependent, but err on the side of something neutral – this isn’t necessarily the time to bust out your favorite shade. Go light, with the goal of just giving a little definition and light color to your lips – not to make it look like you’re wearing lipstick. Once I’ve done this, I powder my lips. This makes them matte, but it also helps the lipstick stay in place. Make sure you purse your lips to get the inside too.
13.) If I know this makeup is going to need to stay in place for a long time, I might also use a setting spray. These are great (I prefer MAC’s.) But keep in mind, this will take the matte look away from your makeup, which isn’t great for under lights. So I will usually re-powder my face after using the setting spray.
14.) If there is kissing in the show, make sure you REALLY powder your lips to within an inch of their life and don’t use that much lipstick, to begin with. This will make sure your onstage partner isn’t constantly having to get lipstick off their face during the performance.
Now, this process can change a bit depending on what venue you’re in. If you’re in a smaller venue, you can get away with sticking more closely with your normal makeup routine since the audience will be closer and the lights won’t be so intense.
I have to say, one of the most liberating makeup-related experiences I’ve ever had onstage is when I played Hamlet. The concept of our production was that Hamlet was a woman who’d been raised as a man for succession purposes. I asked the men in the cast what they usually did for their stage makeup. They all said that in a huge space the might do a paired-down version of what I just described (sans a lot of the eye makeup and lipstick) but that often in a smaller space they wouldn’t wear anything at all. My makeup design for the show ended up being a tiny bit of concealer (if I desperately felt I had a spot that needed it,) a little thickening of my eyebrows, and that was it. It was kind of scary, and ultimately incredibly liberating.
For period pieces, I will change the shape of my lips and maybe venture into some liquid eyeliner and different color eyeshadow, but the basics of the process always stay the same.
About Ashley
Ashley Griffin is the first person in history to be nominated for a major award for both playing and directing HAMLET. As a writer Ashley is most well known as the creator of the pop culture phenomenon FOREVER DEADWARD (New World Stages,) praised by MTV, E!, EW and others, and the hit off-Broadway play TRIAL directed by Lori Petty. Her work has been developed at Broadway’s Manhattan Theater Club, Playwrights Horizons and La MaMa (among others.) Ashley is currently in development with a new network series, and is artist in residence at The Access Theater Company.
As an actress, Ashley has performed on and off Broadway as well as in L.A. and London. This past year she appeared in HOMELAND, THE DEUCE, THE GREATEST SHOWMAN (starring Hugh Jackman,) and in the off-Broadway play THE NEUROLOGY OF THE SOUL at A.R.T. originating the starring role of Amy. She has a BFA from NYU's Tisch School of the Arts (where she has subsequently taught,) and has studied at R.A.D.A., The Boston Conservatory and the Hamilton Academy of Music.